Monitoring wildlife with camera traps unfortunately comes with the risk of theft, especially in publicly accessible areas. Although there is no 100% theft-proof solution, there are ways to greatly reduce the chances of a trail camera going missing.
In this article, we share some of our top tips from our experiences supporting conservation projects that use trail cameras to monitor and research wildlife. In many situations, it may not be practical or possible to utilise all of these measures, but if you can only use a few, that will go a long way towards keeping your equipment safe.
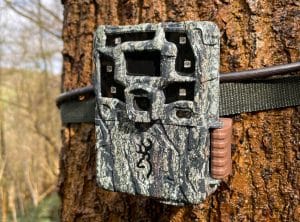
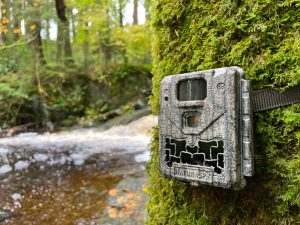
Browning Strike Force Pro X 1080 trail camera locked to a tree
Where possible, keep trail camera setups out of sight. Face the camera away from any nearby trails and lines of sight and install it at least 30 metres from the nearest track or trail.
Beware of sneaky trails! Not all tracks and trails are detailed on maps. Additional trails may get walked or ridden into the ground over time. In some areas, wildlife trails such as the routinely walked routes of deer may be apparent, and these can be great places to capture footage of a variety of wildlife – but give those trails a quick check for boot prints! Once a potentially suitable location for a camera has been chosen, take a moment to scan the 10-20 metre radius around the camera location for trails that might have been missed. Bike trails can be much narrower and harder to spot than trails walked on foot.

A well-walked wildlife trail
Trail cameras commonly use infrared LEDs that are discreet, as they do not produce bright, white flashes at night. This has two benefits: firstly, it reduces the chances of disturbing wildlife, and secondly, it doesn’t draw attention to the camera from afar.
However, not all infrared (IR) LEDs are created equal. IR LEDs are split into two groups: low-glow and no-glow, each of which has pros and cons. No-glow LEDs are invisible to the naked eye but at the cost of a slight decrease in image quality compared to the low-glow equivalent, as the illumination of the area isn’t as effective. Low-glow LEDs produce a visible, dim red glow at night and generally illuminate an area more effectively than no-glow LEDs, producing clearer, sharper images.
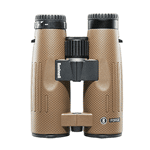
Many brands offer a variety of low-glow and no-glow options with their cameras, such as Browning and Bushnell. For example, the Browning Spec Ops Elite HP5 is a no-glow trail camera and the Browning Recon Force Elite HP5 is low-glow trail camera. The major difference between these two models is the LED flash type, the rest of the specs are similar. So, for the most discreet option, choose a camera that uses no-glow infrared LEDs. However, in situations where best image quality is the priority, low-glow LEDs may be a better choice.
Learn more about low-glow and no-glow LEDs here and check out our article that explores the question of whether wildlife can see trail cameras.
The NatureSpy Ursus trail camera uses no-glow infrared LEDs, pictured in the lower half of the camera.

A Browning trail camera with low-glow LEDs, producing a visible, dim red glow.
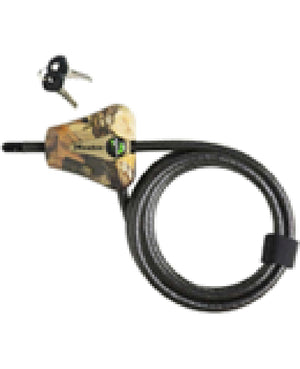
Locks are an effective deterrent for opportunists. Cables locks are commonly used to secure trail cameras to trees, and the Masterlock 8mm Python Cable Lock is widely compatible with trail cameras that have holes in the housing for a lock.
Also consider the tree that the camera is being attached to. Thinner trees are easier to cut through for a determined thief. As a rule of thumb, lock cameras to trees that are approximately 15cm diameter or more. It’s also much easier to attach cameras to trees of at least this size, as they are less likely to move over time or be pushed around by the nose of a curious badger!
Don’t pull the cable lock too tight if the camera is to be left for more than 6 months, as tree growth can push on the lock and cause it to seize. Lubricate the lock mechanism once every year with a water-repellent lubricant such as 3-in-one oil, this is especially important in areas that get a lot of rain and will keep a cable lock going for many years.

A Browning trail camera locked to a tree with a Masterlock 8mm Python Cable Lock
With an additional metal housing, a trail camera security box used in conjunction with a cable lock provides maximum security against meddling hands. Use a security box that is designed for the model of camera being used, as this will ensure the camera still works correctly and important sensors are not blocked. For example, Browning offer a security box in a range of sizes to fit specific Browning models.
The downside to security boxes is the added bulk, so they can be impractical when trekking out with a backpack full of cameras. In most scenarios, if the camera is well hidden, a cable lock alone is sufficient to reduce the likelihood of theft. Security boxes add another layer of protection and can be especially useful when monitoring curious wildlife, when the camera needs to be protected from large jaws, paws and hooves.

The full works: A Bushnell camera trap housed in a security box and locked to a tree.
In addition to using a cable lock to secure a camera to a tree, some cameras feature additional holes to lock the camera shut. This is a useful option to prevent tampering and SD card theft.
Housing lock holes are not universal across camera models. Some cameras do not feature them at all, other models are locked shut with a small additional padlock (e.g. Bushnell Core DS-4K) and some cameras are locked shut by using a cable lock that feeds through the front of the housing when attaching the camera to a tree (e.g. SpyPoint Flex and Reconyx Hyperfire 2).

A SpyPoint Link Micro Solar trail camera is locked shut and secured to a tree with a single Masterlock Python Cable
Label a trail camera with details including project or organisation name, contact info and a brief explanation of why it is there. Use waterproof stickers, for which there are many options for ordering online. This can be an effective theft deterrent, but may also help with returning a camera to your possession if it does end up in the wrong place.

Waterproof stickers are an effective way of labelling a trail camera
One of the easiest ways to fall out with neighbours or a landowner is to place a trail camera on their land without permission. This may also result in a camera being removed. Always obtain permission to install a trail camera on land that is not your own.
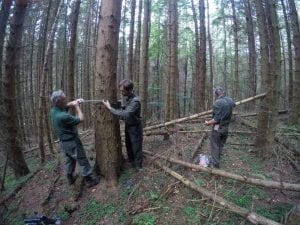
Volunteers install a trail camera
Article by Ed Snell – Project Support and Development at NatureSpy