Trail camera datasets can be big, unruly beasts! In this article, we run through a series of considerations for better management of trail camera footage. With a little planning, footage can be turned into an archive that’s easy to access for current and future projects.
The tips shared in this article come from our experience running the Yorkshire Pine Marten Project, which captured 300,000 trail camera videos over a 3-year period. Those videos were whittled down to 16,000 ecological records covering 62 different species.
This guide is for anyone that’s seeking tips for more effective ways to save and collate trail camera footage so that it’s easier to access, manage and process. This could be for a monitoring or research project, or personal use from a busy garden. The advice we share is particularly useful for projects using 5 or more trail cameras; at this point, the volume of footage can really ramp up over a few months of camera deployment.
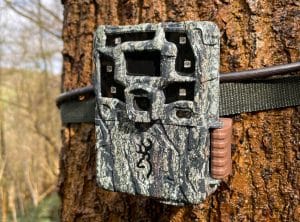
Browning Strike Force Pro X 1080 trail camera, ready to capture footage!
Consider what footage needs to be saved. Some projects may need every photo or video, others may focus on a particular species. Trail cameras can produce rich datasets of footage, but the amount of footage can be overwhelming. It’s not always necessary, or even feasible, to log every single image, as this is a time-consuming task. Another way to think of this is what footage don’t you need?
If the trail camera footage is to go through statistical analysis, this will also inform the data that needs to be collected. Will any analysis packages be used (e.g. camtrapR)? If so, find out if they require anything specific of the camera footage. Find out how to run the analysis and work backwards to ensure the necessary data and supporting information (e.g. environmental data) is saved.
‘Bycatch’ is all the footage a project or survey captures that isn’t the target species or doesn’t support the project aim. Trail camera surveys cast a broad net, capturing images of all wildlife that passes by. Some of this footage may be useful in the future for currently unknown purposes. For example, there may be a rare species caught on camera that isn’t the species of interest for the current project. Consider if there may be any secondary uses for the footage being captured as this will inform how this data is saved and logged.

This might not be the species of interest, but is it useful for future projects?
Give each camera a unique identification. This makes it simpler to track the current locations of equipment, but also proves useful when looking back through records. Write the ID with a marker pen inside the camera door or attach a sticker. Many trail cameras will also allow a camera name to be applied in the settings (e.g. Browning, Bushnell, NatureSpy), so the camera name can be set as the ID, which will appear in the data bar in images.
For example, our Yorkshire Pine Marten Project uses 50 trail cameras split into 5 survey sets. Each camera is allocated to a set and given a number. For example, the first camera in set 1 is number 1, so the unique camera ID is 1-1.

A trail camera data bar contains useful info, including date, time and the camera name or identifier.
A clear and consistent folder structure for saved footage makes for easier navigation of the archive and helps prevent the loss of footage.
A tidier way to bundle up footage is often by survey or batch within a main folder. The cameras within that folder are labelled with the camera ID and any other details that help with easily identifying that camera, such as sequential numbering of the cameras from that survey or batch.
For example, a survey might involve 10 cameras. We’ll call that survey Dalby North Spring 2023. Within the Dalby North folder, the 10 cameras are labelled in the order they were deployed from C1 to C10, along with their unique identifier in the name, so the final folder structure may look like this:

This approach creates a simple folder structure with a clear identification for each camera used in the survey, which also proves useful for creating logbooks or spreadsheets.
The use of mapping software supports the planning and visualisation of trail camera surveys and the routes to each camera, as well as a backup of exact camera locations and useful details such as camera ID. For example, the Garmin Basecamp desktop app is compatible with commonly used Garmin GPS units and can be used for both planning surveys and backing up the saved locations collected on the GPS units in the field.
When a more structured approach to saving footage has taken shape, this is a good time to prepare any logbooks or spreadsheets. For example, a project capturing ecological records of a variety of species will need to capture the fundamental details of who recorded the species, what the species is, the location of the camera and when it was recorded. However, this information is limited in detail and does not help with locating the image within the footage archive. Details such as the survey/batch ID and camera ID will enable this. Other information that may need to be captured includes:
The above list provides some pointers on core information that helps us navigate our project footage at NatureSpy, but there will likely be specific info you need to capture for your project in addition to this.

A snippet from our Yorkshire Pine Marten Project footage catalogue
It’s good practice to save footage in two locations. If using an external hard drive, opt for a large drive (e.g. 1TB+). If data will be accessed from this drive semi-regularly, a solid-state hard drive will be quickest option.
Cloud storage is another option, which is especially useful if other people need to access the footage too. For example, Google Drive is commonly used for this purpose as it has a user-friendly system for streaming videos through web browsers. Beware that the upload and download of video from cloud storage can take a lot longer than an external hard drive, depending on internet connection speed. Upload speeds can be problematic for uploading large batches of footage, as these are often far slower than download speeds.
Processing large amounts of trail camera footage can be a time-consuming task. This is especially true of multi-year projects, but even a project of just a few months can generate thousands of images.
Running a pilot test can highlight if anything is missing and help to create a more fluid, easier process for managing trail camera footage. Gather some sample data or, better still, use actual project footage and set up the folders and any spreadsheets that are required. Have a trial run of saving, processing and filling out any spreadsheets for this footage and consider the following:
Taking the time to run a pilot test will pay off in the long run as this will fine tune the footage archive, making sure that it captures what’s needed and is straight forward to use and navigate.

NatureSpy Ursus trail camera
There are many resources available to assist with managing and processing trail camera footage. Below we list just a few:
Wildlife Insights: Users of Wildlife Insights can upload images to the platform, which automatically identifies species using artificial intelligence. By aggregating images from around the world, Wildlife Insights provides access to data that can be used to monitor and conserve wildlife.
WildID: WildID is software developed by Conservation Metrics that provides tools for identifying individual animals in camera trap images. It uses machine learning algorithms to recognise unique features like stripes or spots on animals and can be trained to recognise specific species or populations.
camtrapR: For those familiar with R, camtrapR is open-source software that provides tools for managing and analysing camera trap data. It includes features for batch-processing images, identifying and categorising species, and calculating animal activity patterns.
The examples above provide some indications of how software may be able to help with managing trail camera data, but the most appropriate option will depend on specific needs and budget.
Article by Ed Snell – Project Support & Development at NatureSpy
See our camera trap chooser page to browse a variety of trail camera models tailored to different needs.
There are many considerations when selecting the right trail camera for a research project. We’ve produced a guide for choosing a trail camera for scientific research, which runs through a series of practical considerations to help with selecting the best camera for your needs.