Trail camera placement can make or break your camera trapping efforts, so here we’ll guide you through some basic steps and processes along with some little hints to help you on your way to perfect camera placement!
Step 1: Understand How Camera Traps Trigger
To perfect your placement it’s important to firstly understand the fundamentals of how camera traps work. You can find more in-depth information and resources about how camera traps work here but at the most basic level it’s useful to know that camera traps need two things for it to trigger; movement AND a change in ambient heat.
How Does a Camera Know That?
Camera traps have a passive infrared sensor, or PIR, which looks for this combination of movement and change in ambient temperature. The PIR sends out strings, or beams that angles and points the beams to different areas. The area this covers is referred to as the detection zone, or arc, and visualising this arc can be really useful when placing your camera as it can give you a great idea of how well your camera is positioned and what you’re likely to get in frame.
Of course, the sensitivity of each camera trap make and model will differ slightly as will the beams focus, but typically they form an arch from the bottom corner of the frame and rise up to the middle of the frame as demonstrated below.
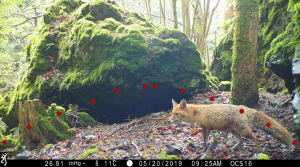
It’s worth noting that the top of the frame on most camera traps is ignored by the PIR sensor and so good placement is even more important for good results.
Keep in mind that the heat and movement signatures will be species dependant; for example a red deer is going to be far easier for a camera trap to spot than a woodmouse! That means that if you’re after larger animals like deer and badgers, you will see much greater detection distances than if you were after mice or hedgehogs.
TOP TIP: To give you some guidance we would suggest that if you are after smaller mammals and small birds, you would need to put the camera closer to the target area – usually within 5 – 10ft. For something like hedgehogs we generally recommend being within 5-15ft.
Will Moving Branches Trigger a Camera?
This is a very common question and generally the answer is no, a branch is not going to be a change in the ambient temperature, so doesn’t satisfy the PIR’s criteria to trigger. The same goes for moving water and grass etc.
BUT… the PIR can be fooled. For example, if you’re somewhere like a forest and it’s a windy, sunny day with the sunlight dappling on the forest floor and the wind is causing vegetation to move around – this could trigger the camera. The same thing could happen with vegetation that is too close to the PIR sensor (generally within 3-4ft). If this moves around, there may be a temperature difference between in front of the vegetation and behind it, so tricks the PIR into triggering.
Modern, quality trail cameras are also much better at recognising these differences and so you see less ‘false triggers’. Proper manufacturers spend more time and effort developing their detection circuits for the best results.
Step 2: Know Your Aim
So now you have a good idea of your detection zone when you come to set up your camera but where do you want to put your camera in the first place? This will all come down to what you’re aiming for with your trail camera and you’ll typically fall into one of these categories.
Are you…
1. Scientific Data Gathering: You will generally want the whole animal(s) in shot and consistently, gathering as many images/videos as possible for a big data set. You’ll probably want your camera on permanently so you never miss a thing and to site it in obvious locations such as on trails.
2. Photographic Styling: You don’t want or need vast amounts of data – You’re happy to take your time and be patient getting the right shot. You’re more inclined to ignore obvious trails and locations – you’ll be looking at the overall aesthetic. What would make a good backdrop?
3. A Hobbyist: Camera trapping for general interest is the most common kind of camera trapper – you just want to know what’s going on in your patch or monitor regular garden visitors. Placement and set-up will be a little more targeted such as on feeders and entryways. In these instances, perfect height and angle will be crucial.
Why would an animal come to that spot?
Think about trails, food, water sources, enrichment, shade, avoidance of roads, dense vegetation, people… etc..
TOP TIP: Setting up your camera facing a load of brambles for instance is going to yield few captures, as like us, animals want to follow the path of least resistance so are unlikely to want to scramble through lots of prickly and dense vegetation if they can help it!
Step 3: Think About Camera Height
It goes without saying that how high you set out your camera will be dependent on your target species and/or the species you know you’re likely to get in your area.
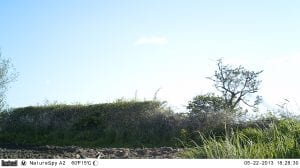
As a general rule, camera traps don’t need to be placed as high as you think and for most UK species your camera needs to be between 30-60cm off the ground.
Know the species in your area (or your target species well) and adjust height placement accordingly.
TOP TIP: We’ve all been known to crouch down in front of our cameras and pretend to be a badger to check height and angles…
Step 4: Check Your Angle
Angle is crucial in getting good quality images.
Angling it too high means you will likely miss detections, but too low can cause overexposure which leads to image ‘bleaching’ or ‘burn out’ – a white ring or patch in the middle of your image, as shown below.
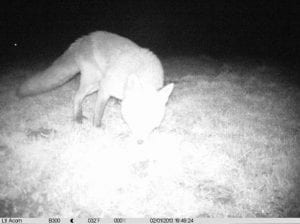
Some wildlife cameras can adapt to this better than others however – for example, Browning cameras adjust exposure instantly to prevent any overexposure.
TOP TIP: Use sticks to help angle and position your camera (using rocks can scratch your camera so you might want to put those down…)
Step 5: Check Weather Forecasts
There are a couple of ways pesky weather can derail your camera trapping efforts but good placement can help to allay these. Remember these two key factors when setting out your cams:
1. Camera traps are weatherproof but NOT waterproof: Good quality camera traps will withstand and work well in temperature extremes including rain, sleet, snow, hail, storms, ice etc; but remember they are weatherproof not waterproof. If you want to put your camera near a river or stream keep an eye on rising water so they don’t get submerged. Check the weather so a sudden deluge doesn’t dunk your camera!
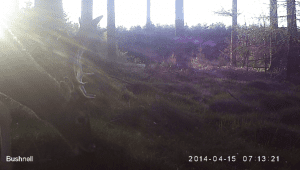
2. Check the sunrise and sunset: Placing your camera facing the direction of sunrises and sunsets will give your images glare and blur. This may not be much of a consideration for garden camera trappers or those who can check cameras regularly but may be worth considering if you’re leaving your cameras for long periods of time. It can be frustrating to come back and find a lot of unusable images!
Step 6: Positioning Checks
So, you’ve found the perfect spot to put your camera, settings all done, height just right, ideal angle and you’re ready to leave your trail cam to do its thing… but there are just a couple of last minute checks to make sure you’re going to get the best captures you can:
Straps tied up?
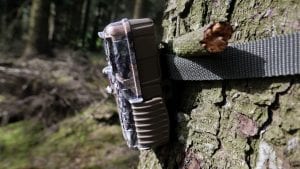
If you’re using the strap provided, securely fasten and tie it up. This might seem trivial but it can end up making a big difference. Loose and untied straps will flap and wave around and spook all the wildlife you’re hoping to attract.
Vegetation double checked?
As mentioned branches and vegetation can obstruct your lens and result in poor quality images, bleaching and contribute to false triggers in combination with the sun. You might want to mindfully clip/trim obstructions, obviously being extremely cautious and considerate to not cause any damage.
You may also need to bear in mind potential rapid vegetation growth during summer when leaving your camera for long periods. That clearing you left your camera in can end up looking more jungle-like, blocking your camera and also making it difficult to find and retrieve.
Some Other Factors to Consider
Disturbance
Animals are sensitive and cautious and if they feel threatened in an area they’re going to avoid it. Unintentional disturbance when setting out camera traps can deter wildlife and impede data gathering. This is more of an issue in more remote areas rather than gardens where local wildlife visitors will be more used to human activity, but here are a few precautions to help limit your disturbance:
1. Try to introduce as few smells as possible
2. Don’t clear too much vegetation
3. Don’t check the site too regularly
Camera traps are a perfect tool for monitoring and watching wildlife non obtrusively and so trail cam set ups should be done so with minimal interruption to any wildlife. The disturbance of any nests, setts, dens, holes etc. should always be avoided when placing camera traps.
Security
This can be one of the biggest concerns when it comes to setting out and leaving your camera. Abandoning an expensive gadget out in the open for days, weeks or months at a time goes against our natural instincts but here’s a few tried and tested tips:
Things To Do:
Things To Avoid:
Be Particularly Mindful About…
Some final recommendations and words of caution regarding trail camera placement:
And that’s it! Hopefully you should now have a good grounding on all the factors affecting camera trap placement and some little tips to help you on your way. You can also find lots more advice and tips in our Support Hub.
Happy Camera Trapping!
The content of this article is copyright of NatureSpy. All rights reserved.
You may print and/or download its contents for your own personal, non-commercial use only.
Re-sale, commercial exploitation, third-party use and any redistribution or reproduction of part or all its contents in any form is prohibited without express written permission.
Nor may you transmit or store any of its contents in any other website or other form of electronic retrieval system.