Trail cameras have become an indispensable tool for watching, monitoring and researching wildlife. These cameras allow us to capture stunning wildlife images and gain valuable insights into animal behaviour. However, to make the most of a camera trap, it is crucial to set it up correctly for optimal performance. In this article, we will guide you through the essential steps to ensure your trail camera is optimised to capture high-quality images and deliver the best results.
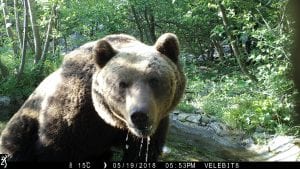
A brown bear poses for the trail camera – Bioterra, Croatia
Understanding and adjusting your trail camera’s settings is vital to optimise its performance. Start by setting the correct date and time to ensure accurate timestamps on your images. Adjust the resolution and image quality settings according to your requirements, balancing image clarity and memory usage; higher quality images will take up more space on the memory card.
Explore settings such as photo mode, time-lapse, or video recording, depending on your intended use. For example, photos are effective for simply detecting a species, whereas video mode can both detect a species and record behaviours. Consider setting a ‘capture delay’ between images to manage the amount of footage the camera captures in busier locations. Learn more about the basic settings and features of trail cameras here.
To avoid running out of battery power too quickly, it is essential to optimise the battery life of your trail camera. The most important consideration is to choose high quality batteries that are compatible with your camera. Typically, lithium AA batteries offer best performance in most trail cameras. Our batteries of choice at NatureSpy are Energizer Ultimate Lithium AA batteries, or Eneloop Pro rechargeable batteries if a camera is compatible with rechargeable batteries. Learn more about the best batteries for trail cameras here. Consider setting a ‘capture delay’ between images to manage the amount of footage the camera captures and extend the life of a camera that is left running and unchecked for longer durations (e.g. 2 months or more).
Some trail cameras offer additional options for extending battery life. Night-time operation is especially power-hungry for a trail camera since it utilises the camera’s infrared flash which is not required during daytime footage. Look for settings on your camera to alter the IR flash power, but note that this can come at the cost of reduced flash brightness at night. For example, Browning trail cameras such as the Elite HP4 and Elite HP5 models feature ‘IR Flash Range’ options, changing the brightness of the infrared flash at night. The IR Flash Range ‘Economy’ and ‘Long Range’ settings are the most efficient, compared to the brighter but more power-hungry ‘Blur Reduction’ setting on the Elite HP4 and Elite HP5 models.

Selecting the IR Flash Power on a Browning Recon Force Elite HP5 trail camera
Selecting an appropriate memory card is often overlooked but is crucial for uninterrupted image capture. Opt for high-capacity memory cards with fast write speeds to handle large image files efficiently. Regularly format the memory card in your trail camera to maintain its performance and prevent any potential data corruption. In most scenarios, 32 GB memory cards allow plenty of space for saving footage over several months of operation. If leaving a trail camera in a busy location for longer durations, consider higher capacity memory cards such as 64 GB or more. Learn more about choosing, maintaining and troubleshooting SD cards for trail cameras here.
Trail cameras are effective for monitoring a broad range of mammal species, from tiny shrews to massive elephants, so the aim of setting out a trail camera can vary broadly. This means there is no ‘right location’ as such. However, if you’re seeking to learn more about the wildlife in an area, look for areas with abundant wildlife activity, such as wildlife trails, watering holes, or feeding areas. Keep in mind that positioning your camera in a discreet and hidden spot is essential to reduce the risk of theft in publicly accessible areas.
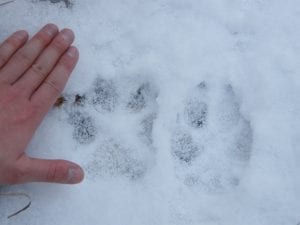
Wolf footprints giving a good indication of who we might expect to see in the area!
Properly mounting and positioning your trail camera is crucial for obtaining clear and well-framed images. Ensure that your camera is securely attached to a sturdy tree or post, and position it at the appropriate height for your desired view. Aim the camera so that the centre of the field of view is in line with a point of interest, such as a wildlife trail, to help with well-framed, quick and reliable triggers. Aim the camera southerly in more open areas to reduce the risk of lens flare distorting images at sunrise or sunset. Learn more about perfecting camera placement here.
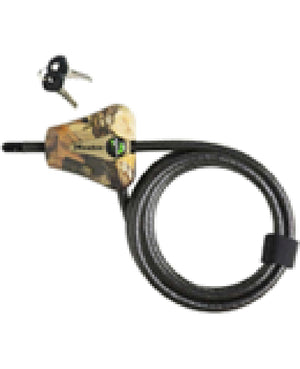
Protecting your trail camera from theft or damage is paramount, especially if it is placed in remote or public areas. Use a cable lock to secure your camera to a tree or post and consider using a security box for an additional layer of security. Some cameras also offer built-in security features like password protection or GPS tracking. Being proactive about security will ensure your camera stays in place. Check out our 7 Top Tips for Preventing Trail Camera Theft.
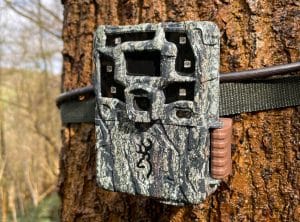
Browning Strike Force trail camera secured in place with a cable lock
Before leaving your trail camera unattended, conduct a thorough testing session to ensure it is capturing images correctly. Walk in front of the camera from different angles and distances to verify its detection range and sensitivity. Review the test images to confirm the camera’s positioning and adjust it if necessary. Taking the time to get this right not only ensures your camera is working as expected, but will lead to better looking, well-framed images.
Maintaining your trail camera regularly will prolong its lifespan and optimise its performance. Check for any signs of damage or wear, especially in the battery compartment, lens, and mounting straps. Clean the lens and sensors with a soft cloth to remove any dirt or debris that might affect image quality. Regularly update your camera’s firmware if the manufacturer provides any updates to enhance performance and fix bugs. Check out our routine maintenance guide for more tips to keep a trail camera running effectively.
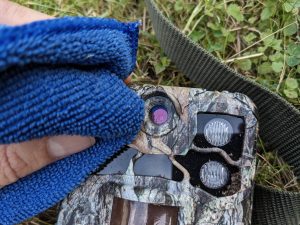
Routine camera maintenance is essential for optimising trail camera setups
Once you have retrieved your trail camera, take the time to analyse the footage and learn from it. Review the images and videos to identify species, behaviours, or any other valuable insights. This information can help you make informed decisions about future camera placement. Consider if there are any ways you could adjust your camera setups in the future to capture clearer images. For example, is the distance between the camera and focal point producing clear, detailed images? Can the camera angle be adjusted for better framing of the scene? A little trial and error can go a long way with perfecting your camera placement and capturing the footage you’re after!
Aside from reviewing footage as a learning experience, the logistics of capturing and saving lots of footage can create a challenge with disorganised files and filling up hard drive space. Check out our 9 Top Tips for Managing Trail Camera Data.
In summary, setting up your trail camera for optimal performance involves careful consideration of various factors, from location selection to camera settings and maintenance. By following the steps outlined in this article, you can significantly enhance the performance of your trail camera, ensuring that you capture high-quality images and maximise your wildlife monitoring experience. A well-prepared trail camera increases your chances of witnessing nature’s wonders and provides valuable data for research and conservation efforts.
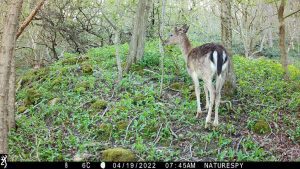
Fallow deer in the North York Moors National Park
It is crucial to check and adjust the settings of your trail camera for optimal performance. Start by setting the correct date and time for accurate timestamps on your images. Adjust the resolution and image quality settings according to your requirements, considering the balance between image clarity and memory usage. Explore settings such as photo mode, time-lapse, or video recording, depending on your intended use. Additionally, consider setting a ‘capture delay’ between images to manage the amount of footage captured in busier locations.
To optimise the battery life of your trail camera, it is important to choose high-quality batteries that are compatible with your camera. Lithium AA batteries, such as Energizer Ultimate Lithium or Panasonic Eneloop Pro rechargeable batteries, are often recommended for best performance. Additionally, some trail cameras offer options to adjust the power of the infrared flash during nighttime operation, which can help conserve battery power. Setting a ‘capture delay’ between images can also extend the camera’s battery life when it is left running for longer durations.
It is recommended to use high-capacity memory cards with fast write speeds to handle large image files efficiently. In most scenarios, a 32 GB memory card provides plenty of space for saving footage over several months of operation. However, if you plan to leave your trail camera in a busy location for longer durations, consider using higher capacity memory cards, such as 64 GB or more, to ensure uninterrupted image capture.
Selecting the right location for your trail camera depends on your monitoring goals. If you want to learn more about the variety of wildlife in an area, look for areas with abundant wildlife activity, such as wildlife trails, watering holes, or feeding areas. It is important to position the camera in a discreet and hidden spot to reduce the risk of theft in publicly accessible areas.
Properly mounting and positioning your trail camera is essential for obtaining clear and well-framed images. Ensure that your camera is securely attached to a sturdy tree or post and position it at the appropriate height for your desired view. Aim the camera in line with a point of interest, such as a wildlife trail, for well-framed and reliable triggers. In more open areas, aim the camera southerly to reduce the risk of lens flare distorting images at sunrise or sunset.
With proceeds generated by our online shop, NatureSpy is proud to support a variety of projects that use trail cameras for wildlife conservation. From Andean bears in Ecuador, iconic African wildlife in Zambia to eagles in Wales. Head over to our Project Pages to learn more about our conservation project partners.